
There’s just something magical about baking overnight sourdough bread-especially when it fits into real life. With just a few stretch and folds in the evening and a long, slow ferment overnight, you can wake up to dough that’s ready to shape and bake. This method is ideal for busy home bakers who want a crusty, chewy artisan loaf without kneading for hours. Whether you’re new to sourdough or looking for a more relaxed routine, this recipe delivers consistent results with minimal effort.

Easy Overnight Sourdough Bread
Ingredients
Method
- Step 1: Mix the DoughIn a large bowl, combine the starter, water, flour, and salt. Mix together until no dry bits remain-this is a shaggy sticky dough. Let rest for 30 minutes to 1 hour (this is called the autolyse)
- Step 2: Stretch and Folds:After the autolyse is done , gently stretch one side of the dough and fold it over.Rotate the bowl and repeat on all sides. I do as many stretch and folds as I can for about 5 minutes to get the dough to become smooth.
- Step 3: Bulk Fermentation Cover the bowl with a damp towel or plastic wrap. Leave the dough to rise overnight at room temperature (about 8-12 hours) It should double in size and look soft and airy by morning
- Step 4: Shape the DoughIn the morning, turn the dough out onto a floured surface. Gently shape it into a round loaf (boule) or oval (batard), being careful not to deflate it. Cover the dough with a towel and let it rest.
- Step 5: BakeWhile your dough is resting Preheat your oven to 450 degrees with a Dutch oven inside.After your dough has rested, gently place it on parchment paper and then score the top of your loaf.Gently place your dough into your Dutch oven and cover with lid Bake covered for 20 minutesRemove lid and bake another 20-25 minutes until deep golden brownLet cool atleast 1 hour before slicing
Step-by-Step Instructions with Photos
Before we can bake this delicious overnight sourdough bread, we need to start with a bubbly, active, happy starter. A starter is a natural mixture of flour and water that captures wild yeast from the air-no commercial yeast required! It takes about 5-7 days to develop and becomes the foundation for all your sourdough baking. If you don’t have on yet, I recommend starting here Sourdough Starter Recipe by King Arthur Baking
This is what my happy sourdough starter looks like, This is what you will have when you are finished with the starter process. If you maintain it, it will give you many beautiful and yummy loaves of bread . Now that we have that important part out of the way let’s move onto getting this bread put together.


Step 1: Combine All Dough Ingredients
I always weigh my ingredients the way I have listed in my recipe above, but in case you don’t have a scale here is the ingredient list using cup measurements.
31/2 cups bread flour
1/2cup active sourdough starter
11/2 cups water
2 tsp salt
Combine all these ingredients starting with sourdough starter, water, bread flour and then salt.
Mix thoroughly until everything is incorporated well- this is a shaggy, sticky dough. Cover your dough with a damp towel and let autolyse for 30-minutes-1 hour. I usually only do 30 minutes, I’m usually tired and want to get to bed.😂

Step 2: Stretch and Fold
After the 30 minute autolyse is complete, perform your stretch and folds.
- Gently stretch one side of the dough and fold it over.
- Rotate the bowl and repeat on all sides

This is not me 😂😂. I forgot to photograph my stretch and folds and I wanted to give you something for an example. If you’re unsure of how to do stretch and folds, look up a quick tutorial on YouTube for help.

This is how the dough looks after some stretch and folds have been done. It has come together more and is more smooth and not so shaggy looking like when we first mixed everything together.
Step 3: Bulk Fermentation (Overnight)
Cover the bowl with a damp towel or plastic wrap. Leave the dough to rise overnight at room temperature (about 8-12 hours). It should double in size and look soft and airy by morning.

Step 4: Shape the Dough
In the morning, after you’ve had some coffee and woken up a bit, turn the dough out onto a floured surface. Gently shape it into a round loaf (boule) or oval (batard), being careful not to deflate it. lightly drape a towel over your dough and let rest for 30 minutes.

This is what your dough will look like when you get it out of your bowl before you shape it. Gently tuck the ends under and slowly drag it across your counter to give yourself a nice tight top of bread.
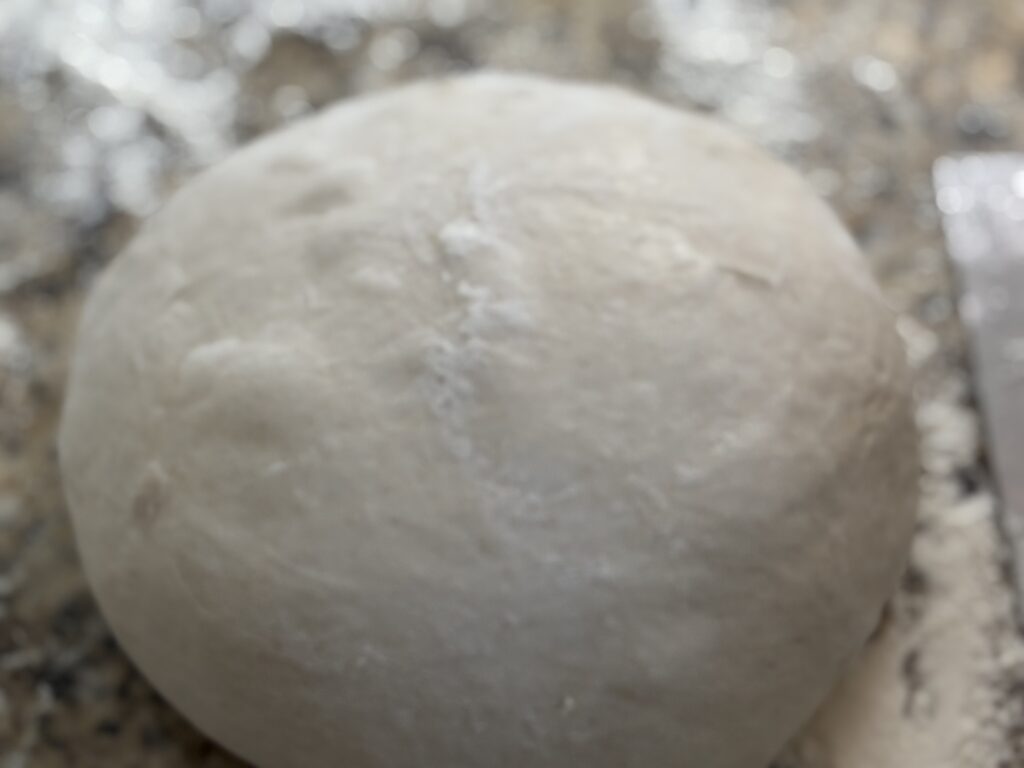
This is what your dough will look like after it’s shaped with a smooth top. Remember if you’re unsure of how to do these steps YouTube is a great resource when you are just starting out. ☺️
Step 5: Bake
Let’s get that oven and your dutch oven preheated. Sourdough likes HEAT to rise. Place your dutch oven in your oven and crank the heat to 450 degrees. You can do this right away and let your oven and dutch oven pre-heat for 30 minutes to and hour before you actually bake the bread. I know it sounds a bit much, trust me, your bread dough will love it!
Once your oven is pre-heated and your rest period is up gently slide your dough onto parchment paper, score the top with a lame or sharp knife. Place your dough into the dutch oven, cover with lid and bake for 20 minutes. Remove lid and continue baking for another 20-25 minutes or until nice and golden brown.


Remove bread from dutch oven and cool for at least an hour. Enjoy!
From My Hearth to Yours,
Becky♥️
Leave a Reply